Smooth, even lighting is super cool for homes, stores, and fancy decorations. COB LED strips are the best choice for getting that perfect glow without any dots. This guide shows you how to put them up the right way to make any space look awesome. With tips from RAYMATES, a top company for bright and reliable LED lighting solutions, you’ll get a pro-looking result every time.

Why Choose COB LED Strips?
What is COB Technology?
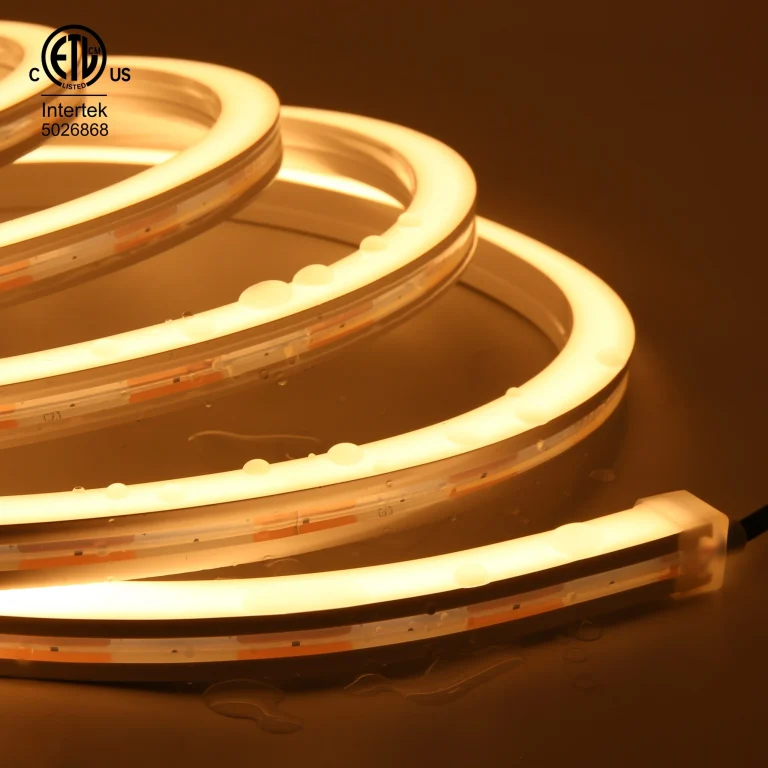
COB stands for Chip-on-Board. It means lots of tiny LED lights are packed super close on one board. This makes a strong, smooth light. Unlike older strips, COB LED strips don’t show little light dots, so your lighting looks clean and neat.
Advantages Over SMD LED Strips
- No dots: COB LED stripsgive a solid line of light, like a glowing ribbon.
- Bright glow: They shine more per meter than other strips.
- Cooler running: They stay cool because of their special board.
- Bendy uses: They work great on curvy spots or tight corners.
RAYMATES makes awesome COB LED strips that are super smooth and have UL, CE, and RoHS safety stamps.
Planning Your COB LED Strip Installation
Choose the Right COB Strip
- Voltage: RAYMATEShas 12V, 24V, and even 110V/220V for big projects.
- Color Temperature: Pick warm white (3000K), neutral white (4000K), or cool white (6000K) for the vibe you want.
- Waterproof Rating: Use IP20for inside. Pick IP65 or higher for outside or wet spots.
- Board Width: Choose from 3mmto 30mm for tiny or wide spaces.
Calculate Length and Power Requirements
- Measure where you want the strip to go.
- Figure out the total power (watts per meter times total meters).
- Get a power supply with 20% extra juice to keep things bright.
Decide Mounting Method
- Sticky tape: Use 3M adhesive backingfor flat, clean indoor spots.
- Metal channels: Try aluminum profiles for a cool look and less heat.
- Clips or brackets: Great for rough surfaces or outdoor setups.
Tools and Materials Required
- COB LED stripfrom RAYMATES
- Matching power supply
- Soldering kit or strip-to-wire connectors
- Aluminum profile with diffuser (if you want)
- Extension cables and mounting clips
- Screwdriver, measuring tape, cleaning wipes
Step-by-Step Installation Guide
1. Surface Preparation
Clean the spot where the strip goes with alcohol wipes. This makes the sticky part hold tight. A clean, smooth surface stops the strip from falling off, like making sure a sticker stays on your notebook.
2. Cutting the COB Strip
Cut only at the marked spots, usually every 25mm to 50mm. Use sharp scissors or a blade. Don’t hurt the nearby wires. It’s like cutting paper along a dotted line for a craft.
3. Connecting Segments
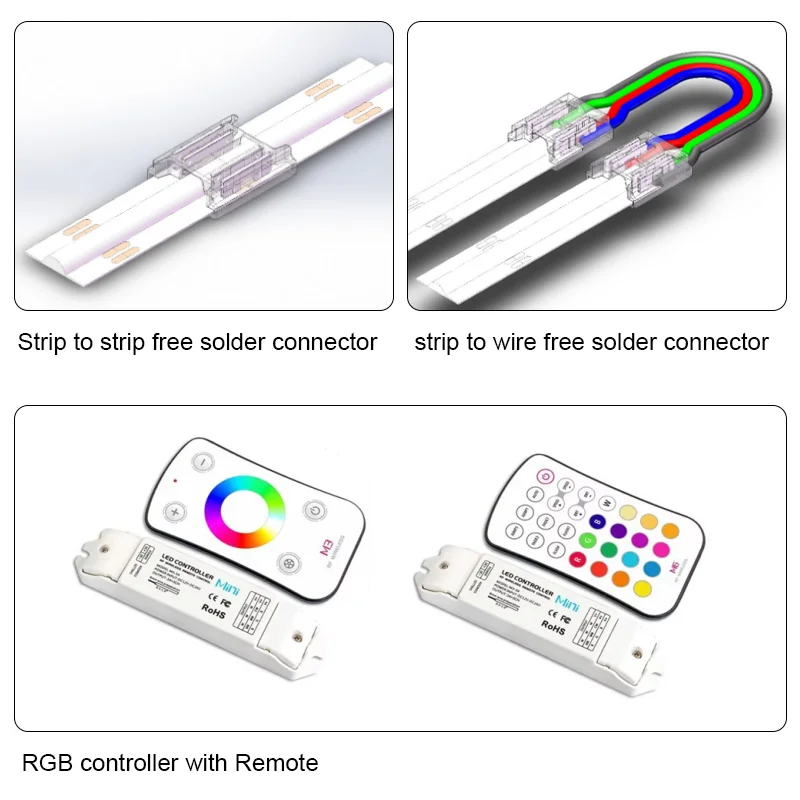
Join COB LED strip pieces by:
- Soldering wiresto the copper pads for a strong hold.
- UsingRAYMATES’ solderless connectors for a quick, easy fix.
Both ways keep your lights shining bright, like linking toy train tracks.
4. Mounting the Strip
- Peel off the sticky backing and press the strip down slowly.
- For aluminum profiles, slide the strip into the channel and add the diffuser cover.
- Keep it straight to avoid weird shadows or dark spots, like lining up dominoes.
5. Wiring to Power Supply
- Match the voltage and plus/minus signs (+/-) right.
- Use terminal blocks or waterproof connectors for outdoor setups.
- Put the power supply in a spot with air flow and no water, like keeping a toy dry.
6. Adding Controllers (Optional)
For color-changing or dimming COB LED strips:
- Hook up a controller that works with PWM, 0-10V, orsmart systems like WiFi or Zigbee.
- UseRAYMATES’ remote or app to play with colors and brightness, like a magic wand for lights.
7. Testing the Installation
Turn on the strip and check:
- Even, bright glow.
- No flickering or dark patches.
- Everything works great under full power.
It’s like testing a new toy to make sure it’s fun.
Using Aluminum Profiles and Diffusers
Why Use Aluminum Profiles?
- Keeps things cool: Helps COB LED stripslast longer.
- Looks pro: Hides wires and makes it neat.
- Smooth light: Diffusers stop harsh shadows for a perfect glow.
Installing in Profiles
- Put the strip in a clean channel.
- Snap on the diffuser cover.
- Add end caps and use clips to hold it tight, like building a toy track.
Tips for Achieving Seamless Lighting Effects
- Pick high-density COB LED strips(like 480 chips/meter).
- Use aluminum profiles with frosted diffusers.
- Don’t leave gaps when sticking the strip.
- Test the light before locking it in place.
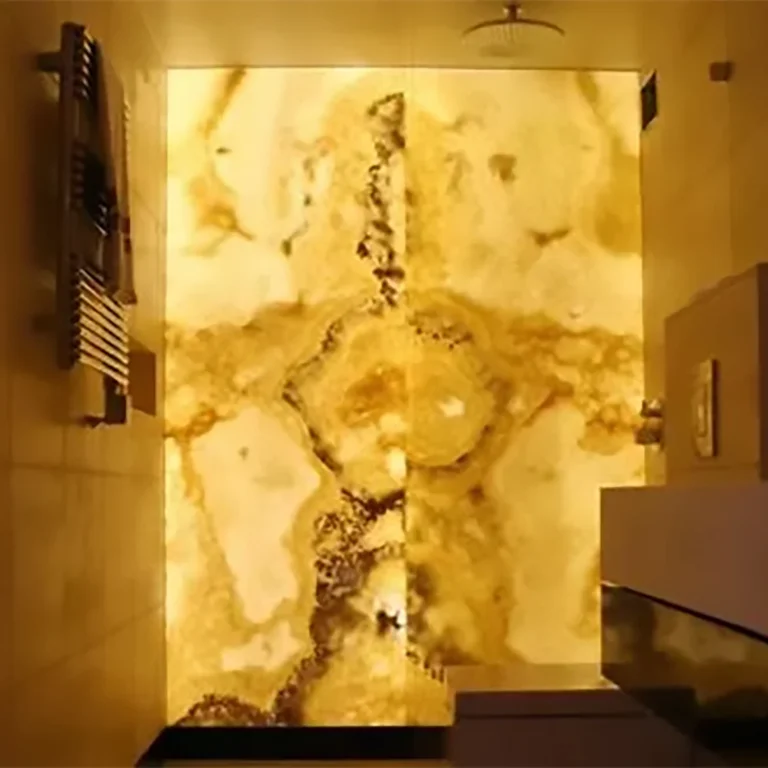
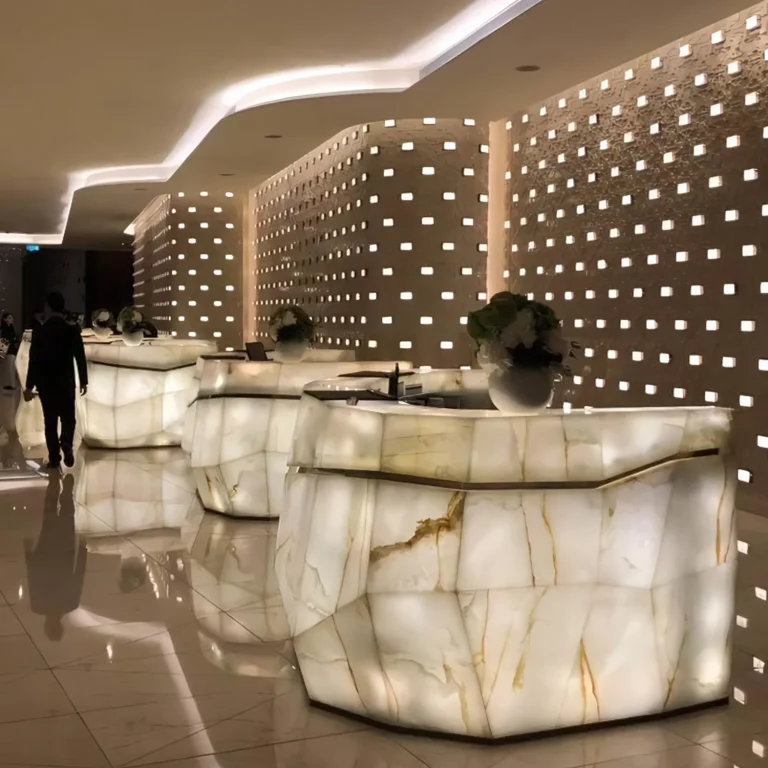
RAYMATES’ patented COB LED strips bend, cut, and glow edge-to-edge for fancy stores, hotels, or home projects.
Common Mistakes and Troubleshooting
Voltage/Power Mismatch
Make sure the strip and power supply match. If the power’s too low, the lights might dim or flicker, like a weak battery in a flashlight.
Incorrect Cutting
Don’t cut outside the marked lines. Wrong cuts can break the strip, like tearing a paper chain in the wrong spot.
Adhesion Failures
Clean surfaces well before sticking. For bumpy surfaces, use clips instead of tape, like using glue for a tricky craft.
Connection Errors
Check plus/minus signs on connectors. For RGB or color-changing strips, make sure colors line up right to avoid weird lights.
Maintenance and Long-Term Care
- Check connections and how the strip is stuck now and then.
- Swap out broken parts fast.
- Keep power supplies clean and airy.
- For outdoor strips, look at waterproof seals every year.
It’s like keeping your favorite bike shiny and working.
Conclusion
Putting up COB LED strips is easy with the right steps and tools. You’ll get smooth, dot-free lighting that makes any space look amazing. RAYMATES gives you top-quality COB LED strips with global safety stamps like UL, CE, and RoHS. Their strips make your projects shine bright and last long.
FAQs
Q1: Can I use COB LED strips outdoors?
A: Yes! Pick RAYMATES waterproof COB LED strips (IP65/IP67) and use sealed connections, like a raincoat for your lights.
Q2: Do I need an aluminum profile for COB strips?
A: Not a must, but it’s super smart for cooling and a smooth, pro glow.
Q3: What is the best voltage for residential installations?
A: 12V or 24V is great for homes. RAYMATES has both, depending on how bright and long you need.